Joined: 16 Jun 2004
Posts: 9481
Location: Where you least expect
for shame xD
well i havent even touched the thing since i last posted because of work and such so no progress on any robots actually
, so i just compiled a few thoughts of what i need to do here..
the standard scooter shafts are too wide for what i want and they dont fit in the new wheels. i also thought the 8mm or so was a little on the thin side for a lightweight drive shaft so beefing it up to a 12.5mm one should be fine. and being a bolt will make mounting easier. ill also have to redrill the plates out or totally remake them to get the new shafts to sit lower as the new wheels are a bit smaller than planned. or another option is to just bolt them on tilted so it sits lower and cut off a bit of material on the plate which is the prefered option so far.
still working out what bolts i need for the drive shafts as the 1/2" shafts from bunnings are totally off in size... so i might just get some 13mm ones and call it quits there.. my conclusion is bunnings hold tolerances to about + - .5cm
still need to get a couple of tools before i start building, mostly concerning the need for some much bigger drill bits to drill out steel with, i need about a 1/2" - 16mm and maybe a bit bigger than that too.. ive tried spade bits and they royally suck so if anyone knows where to get steel drill bits that size for a chuck that can handle 12mm that would be appreciated
as for batteries it dawned on me that soldering up and making packs for 80 cells was going to totally suck, so im just taking the old batteries from cobra when the new ones get here and adding the 4 spare cells onto that pack and just running it all off 30v. im hesistant about taking it any higher for the IBCs sake.
also went out to bunnings up the road to scope out what box section they had and the closest was 19x19x2 so ill use some of that and get a bit of weight saving which ill put into bracing it up to account for the thin wall of the stuff. so ill be out to get 4 meters of the stuff on sunday with anything resembling luck.
main priority at the moment is to build the chassis and jaw assembly and all the rest will come after that. how i miss my time and bludging _________________ www.demon50s.com - Minimoto parts
http://www.youtube.com/user/HyzerGlen - Videoooozzz
Fri Jun 16, 2006 11:15 pm
andrew
Joined: 16 Jun 2004
Posts: 3110
Location: Castle Hill, Sydney. N.S.W
i have a 14-15mm drill bit that works nicely if u sart with a small hole and drill a hole a few sizes up etc etc etc until your able to use it properly and it bites good
I used it to drill out the holes in lockjaws drive axles, so went through box section descently, cost bout 40 from bunnings though :S _________________ Andrew Welch, Team Unconventional Robotics
Sat Jun 17, 2006 12:19 am
Nick Experienced Roboteer
Joined: 16 Jun 2004
Posts: 11802
Location: Sydney, NSW
About the drill bits: you need to think about how powerfull your drill press is before you spend $$$ on large bits. My press is 'rated' to drill up to 16mm and beyond that the belts start slipping and things tend to bend - if your drill press is much smaller, you will run into problems. I got some large diameter reduced shank bits from Bunnings and most any engineering place will have a good selection. I recall that a 1" bit cost over $40... _________________ Australian 2015 Featherweight champion
UK 2016 Gladiator champion
Sat Jun 17, 2006 1:14 am
Glen Experienced Roboteer
Joined: 16 Jun 2004
Posts: 9481
Location: Where you least expect
well aint that a bit of a bugger. im thinking of just using the welder to blast the hole out and then dremelling it down to size.
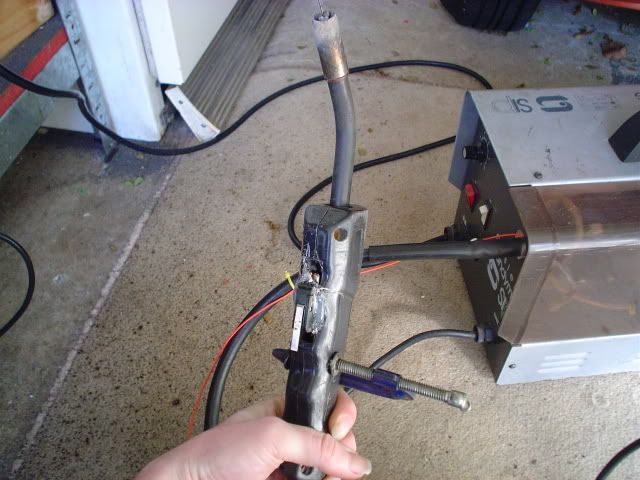
and i got myself 3 meters of 19x19x1.6 box section so i can get started on the frame when i de-screw my welder after the button has somehow gone missing from the trigger... needs a new one before i can do anything..
Joined: 16 Jun 2004
Posts: 9481
Location: Where you least expect
well after i got a day off work because the cops blocked off the street work is on i did something on hyzer. its so wierd... i got all this done before 11am i hate early days.
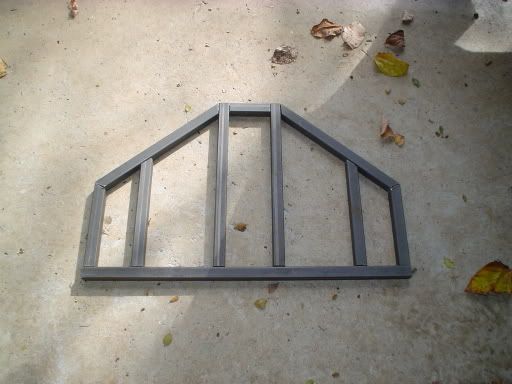
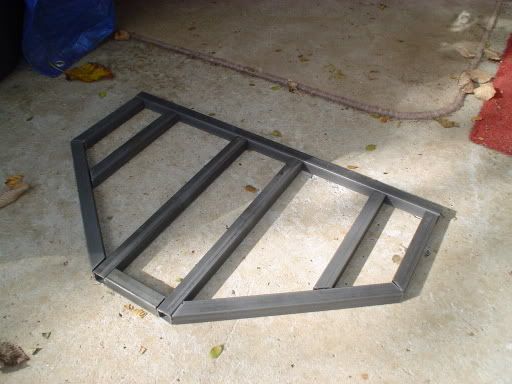
firstly i got all the bottom part of the frame cut out. i didnt have enough to get the top crusher part done but hopefully i can get my hands on some geniuine 20x20x3 box section for that part. this bunnings box section is fairly crappy.
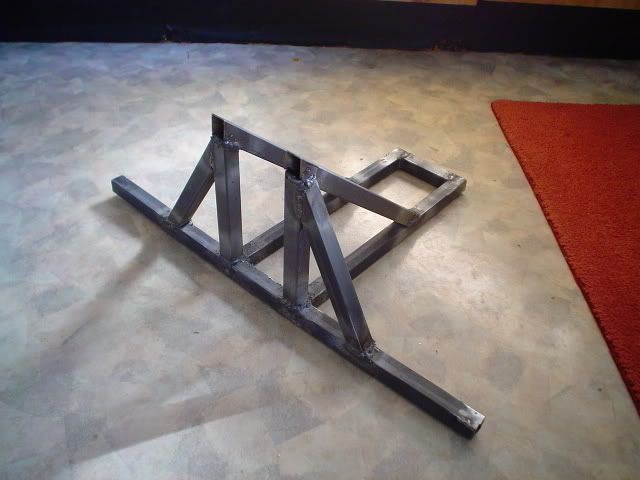
Heres a pair of pics of the frame bits all cut out to size. theres going to be a ton of little brace plates and horizontal ties and such in there in the end depending on how the weight goes. was going to clean it up with the flap disk but it all seems to fit more than well enough without it. will fix the back two up though as they're pretty ugly.
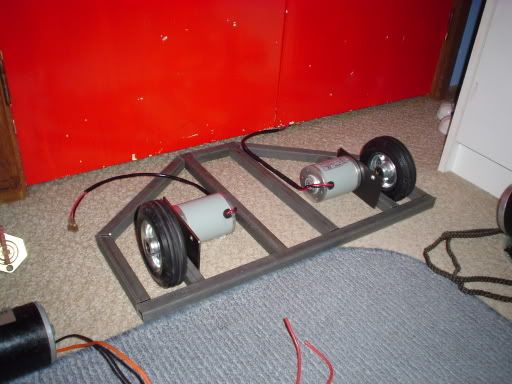
and with the scooter motors and wheels sitting in there as well as the IBC which will sit snugly in that little channel. its not sitting in right at the moment because the servo wires come out the side. but itll be good after that.
only screw up so far is the scooter motor mounts where i havent cadded them right and the shaft is much shorter than planned. so ill have to bolt the mount onto the front of the box section instead of the back and adjust where it mounts and so forth.
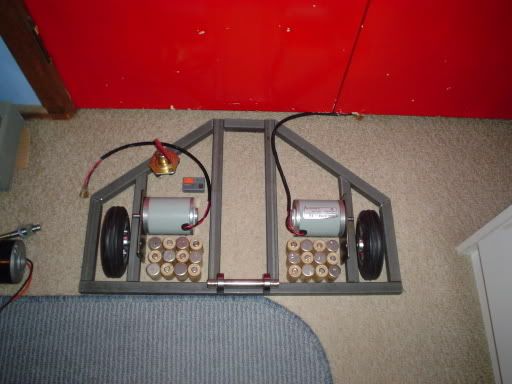
EDIT - just realised the weapon actuator mount is garbage so thatll need to get re thought as well. ack ack. and i added a pic with some stand in cells too. _________________ www.demon50s.com - Minimoto parts
http://www.youtube.com/user/HyzerGlen - Videoooozzz
Tue Jun 20, 2006 11:48 am
Philip Experienced Roboteer
Joined: 18 Jun 2004
Posts: 3842
Location: Queensland near Brisbane
That is a neat job. _________________ So even the rain that falls isn't actually going to fill our dams and our river systems
Tue Jun 20, 2006 5:14 pm
dyrodium Experienced Roboteer
Joined: 24 Aug 2004
Posts: 6476
Location: Sydney
glen lol, that reciever looks so out of place, if you look away once you'll never find it again! Gotta get me one lol _________________ ( •_•)
Joined: 16 Jun 2004
Posts: 9481
Location: Where you least expect
AHHHHHHH
tried welding the frame up after fixing my welder and every time i did the frame would fall apart every time i picked it up
and after welding the wrong vertical bits on twice over im calling it a night... ill try reweld some test bits tonight... _________________ www.demon50s.com - Minimoto parts
http://www.youtube.com/user/HyzerGlen - Videoooozzz
Sun Jul 02, 2006 5:20 pm
Totaly_Recycled Experienced Roboteer
Joined: 15 Jun 2004
Posts: 1346
Check thaty you havent reversed the polarity of the welding leads when you were fixing the welder .
Sun Jul 02, 2006 5:37 pm
Glen Experienced Roboteer
Joined: 16 Jun 2004
Posts: 9481
Location: Where you least expect
lol nah i just soldered a new button on so its just the leads the activate the main power.
but i just did a test weld on full power and i couldnt get the box section to break even when i was belting it up with a hammer, so it must be done at full current it seems.
Joined: 16 Jun 2004
Posts: 9481
Location: Where you least expect
well spent all day having to grind back the welds with my little bench grinder as i didnt want to do it with the angle grinder in case i gouged into the metal too much, then i wirebrushed it all back to the shiny metal so it would weld better.
the box section must have some dirty crap layer on top becuase it welded beatifully this time. i did a test piece and i finally managed to get it to penetrate all the way through the metal
got the main center section done and just need to finish grinding back and welding up the weapon support bits as i was abit too tired to finish it off. so ill finish that and take a pic tommorow.
ill have to hammer a few pieces back to shape as well. it tweaked in welding but i hammered it a little tonight and couldnt get it to budge so ++ with the welds this time i hope. _________________ www.demon50s.com - Minimoto parts
http://www.youtube.com/user/HyzerGlen - Videoooozzz
Sat Jul 22, 2006 6:58 pm
Glen Experienced Roboteer
Joined: 16 Jun 2004
Posts: 9481
Location: Where you least expect
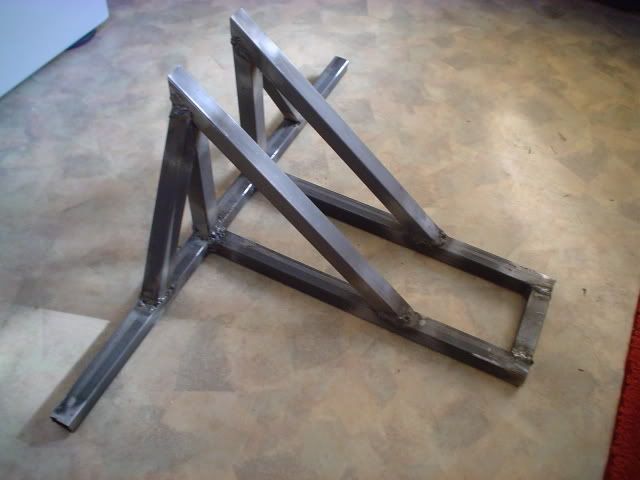
yey finished it! heres the center section.
a few pictures.
the front spare is twisted some as is the back end. but its tolerable enough for me. im going to weld some steel in the gaps formed by the triangles to make it mega strong. i was jumping about on it and chucking it across the yard. good good. only weighs 2.2kg at this stage as well.
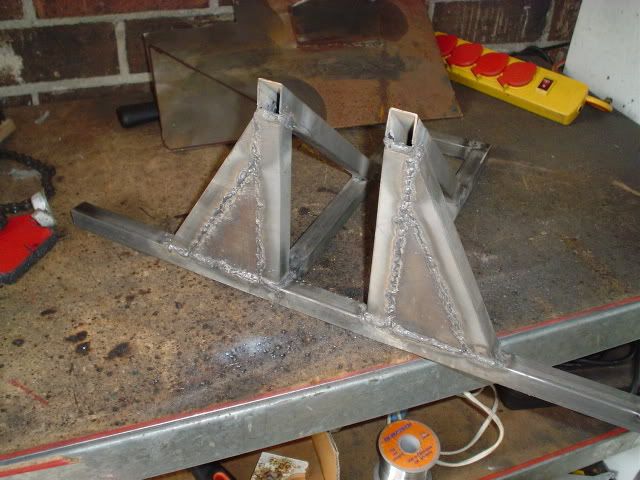
and i also think its worth explaining the quality of the welds. a picture is worth a thousand words xD
You cannot post new topics in this forum You cannot reply to topics in this forum You cannot edit your posts in this forum You cannot delete your posts in this forum You cannot vote in polls in this forum

 RoboWars Australia Forum Index
-> Builders Reports
RoboWars Australia Forum Index
-> Builders Reports


 , so i just compiled a few thoughts of what i need to do here..